

Below, you can choose a campus to view detailed descriptions of the different lecture rooms at all our campuses.
All of our lecture rooms are designed to be as easy to use as possible. However, since the setup may vary somewhat between rooms and campuses, lecturers are advised to familiarize themselves with the room in question before teaching starts.
The different microphones you can find at Nord;

(Catchbox to the left, handheld microphone in the middle and headset microphone to the right) Headset microphone:
- To mute or unmute, slide the switch on the top of the unit.
The light will be green when the microphone is unmuted, and red/orange when it is muted.
Handheld microphone:
- To mute or unmute, slide the switch below the microphone head.
Catchbox:
- The Catchbox is automatically muted, and audio is only transmitted when the unit is in use.
It can be thrown freely to members of the audience. - If the unit seems to be switched off, twist the cylinder out of the box to access the on/off button.
See picture:

How to charge the microphones:
- Chargers for the microphones are usually located by the board and the lectern in the lecture room.
See picture:

- To mute or unmute, slide the switch on the top of the unit.
- Start PowerPoint as you normally would.
- To control which monitor displays the slide show, select the tab Lysbildefremvisning:

- Choose which monitor you'd like to use:


- Select the tab Lysbildefremvisning again, then press Fra begynnelsen:

Will you be using the monitor as a whiteboard?
- Open Openboard and make sure it covers the entire writable screen.

This is what the Openboard icon looks like. - Locate the pen(s) at the bottom of the screen.
- The pen may also be located on the side of the screen, or in a dock on screens placed on the lectern.
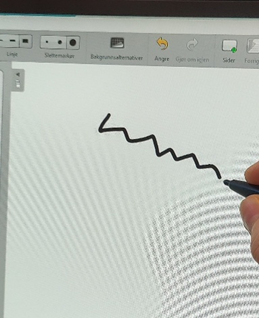
- Choose color via the menu at the top and start writing.
- Open Openboard and make sure it covers the entire writable screen.
Will you be using Teams?
Information coming soon
Will you be using Zoom?
- Make sure the correct audio devices are selected. If you restart the PC, these will be selected automatically.
- To test them, select "Test speaker & microphone".
- To adjust the volume level, select "Audio settings" at the bottom of the menu.


Other audio adjustments
- The volume from the speakers can be adjusted on the PC in the lower right-hand corner, or using the control panel in some rooms and auditoriums.
- The microphone level, meaning what remote participants hear from you, can be adjusted by moving the microphone closer to your mouth.
Note: There are NO microphones available for students or other participants, except in some rooms equipped with a Catchbox microphone.
- Start Edge or a different browser.
- Log in with your Nord account:

- Press the dots in the top left:

- Select OneDrive:

- Choose the file you wish to download by checking the box to the left of the file name:

- Then select Last ned:
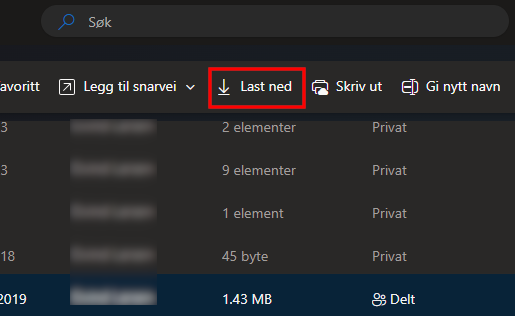
- The status bar in the browser now shows the downloaded file, click this:

 PowerPoint will open the file and you can now start your presentation.
Before leaving the room, please be considerate of the next people who will be using it.
- Take your personal belongings with you.
- Return any cables that have been used to their proper place.
- Close the web browser.
- The computer may also be restarted.
- Microphones must be placed back in the charging station.
- Wipe the whiteboard/board clean if you have used it.
- Tidy up after yourself and take your rubbish with you.
- Wires and cables must not be disconnected. Troubleshooting is IT’s responsibility.
To submit a request for teaching or event-related needs, please see A/V in the Nord help portal.
Updated
06.08.2026
Updated by
IT Helpdesk